Skimming and Reformatting Steps for RECASTing the VHbb Analysis
Overview
Teaching: 10 min
Exercises: 40 minQuestions
How do I use the yadage syntax I’ve learned to preserve the analysis steps needed to prepare my signal for interpretation?
Objectives
Practice using yadage syntax to describe the first two steps of our VHbb analysis.
Add a new executable to your analysis framework to convert the ROOT histograms created by Analysis payload to a simple text file format.
Introduction
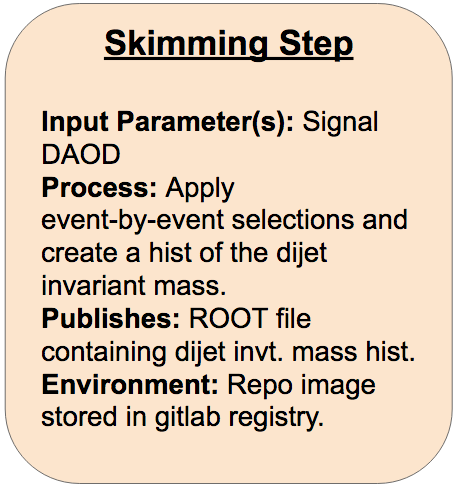
We now have all the yadage tools to put together our VHbb RECAST workflow, starting by “yadage-ifying” our first two analysis steps using the syntax we just learned. We can use essentially the same yadage structure and syntax for defining our analysis steps as we did for the message writing and shouting steps.
Skimming Step

On gitlab, create a new repo to contain your workflow. Name it something like {name}-workflow. Clone your new repo onto your computer.
In another shell, cd into the workflow repo and start the yadage container so you can validate and test the steps and workflow as you develop. You’ll also need to log in to the gitlab docker registry using your CERN credentials so yadage can automatically pull images from the gitlab registry:
cd [your workflow repo]
docker run --rm -it -e PACKTIVITY_WITHIN_DOCKER=true -v $PWD:$PWD -w $PWD -v /var/run/docker.sock:/var/run/docker.sock yadage/yadage sh
docker login gitlab-registry.cern.ch
cd into your new workflow repo, and create your empty steps.yml and workflow.yml files. Next, create a directory called inputdata, copy your signal DAOD file into inputdata, and rename it recast_daod.root:
cd /path/to/new/workflow/repo
touch steps.yml
touch workflow.yml
mkdir inputdata
cp /path/to/DAOD_EXOT27.17882744._000026.pool.root.1 inputdata/recast_daod.root
Providing files to yadage
Since we have a signal DAOD file for yadage to process, we’ll need a way to tell the yadage-run command where to look for the DAOD file. This functionality is provided by the
-d initdir=option. For example, if the file to input is namedinputfile.txt, and it’s located in the directoryinputdatasyntax for passing it to yadage-run as the variable inputfile would be:yadage-run workdir workflow.yml -p inputfile=inputfile.txt -d initdir=$PWD/inputdata
Exercise (10 min)
Part 1:
Fill in the FIXMEs in the following skeleton code to encode the first skimming step of the analysis in your steps.yml file.
skimming_step:
 process:
   process_type: interpolated-script-cmd
   script: |
     # Source the ATLAS environment
     [FIXME]

     # Run the AnalysisPayload executable from the run directory to produce the output ROOT file, looping over **all** events.
     [FIXME: source setup script to run executables]
     cd [FIXME]
     [FIXME] {input_file} {output_file}
 environment:
   environment_type: docker-encapsulated
   image: [FIXME (use your gitlab registry image!)]
   imagetag: master
 publisher:
   publisher_type: interpolated-pub
   publish:
     selected_events: [FIXME]
Part 2:
Fill in the following skeleton code to encode the corresponding workflow stage in your workflow.yml file.
stages:
- name: skimming_step
  dependencies: [FIXME]
  scheduler:
    scheduler_type: singlestep-stage
    parameters:
      input_file: {[FIXME], output: signal_daod}
      [FIXME]: '{workdir}/selected.root'
  step: [FIXME]
Solution
Part 1
skimming_step:
  process:
    process_type: interpolated-script-cmd
    script: |
      # Run the AnalysisPayload executable to produce the output ROOT file, looping over **all** events.
      source /release_setup.sh
      source /Bootcamp/build/x86_64-centos7-gcc8-opt/setup.sh
	    cd /Bootcamp/run
      AnalysisPayload {input_file} {output_file}
  environment:
    environment_type: docker-encapsulated
    image: [gitlab registry image for your analysis repo]
    imagetag: master
  publisher:
    publisher_type: interpolated-pub
    publish:
      selected_events: '{output_file}'
Part 2
stages:
- name: skimming_step
  dependencies: [init]
  scheduler:
    scheduler_type: singlestep-stage
    parameters:
      input_file: {step: init, output: signal_daod}
      output_file: '{workdir}/selected.root'
    step: {$ref: steps.yml#/skimming_step}
Debugging Hints
Could temporarily reduce the number of events you run over with
AnalysisPayloadfor the purposes of debuggingRemember you can use the
packtivity-validatecommand in your yadage container to quickly check if your step definition is valid:packtivity-validate steps.yml#/skimming_step
- The step can be tested in your yadage container with a
packtivity-runcommand like:packtivity-run steps.yml#/skimming_step -p input_file="'{workdir}/inputdata/recast_daod.root'" -p output_file="'{workdir}/selected.root'"
- The workflow can be tested with a
yadage-runcommand like:yadage-run workdir workflow.yml -p signal_daod=recast_daod.root -d initdir=$PWD/inputdata
- The output file should be located under
workdir/skimming_step/selected.rootafter a successfulyadage-run.
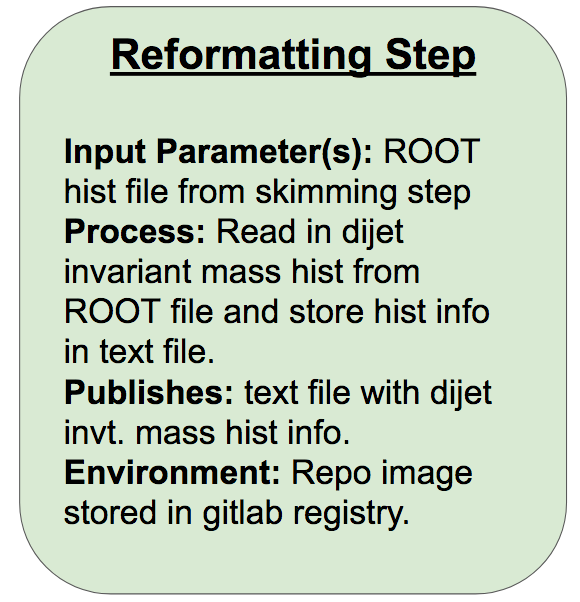
Reformatting Step

In this step, we read in the dijet invariant mass histogram h_mjj_kin_cal that was written out to a ROOT file in the last step, and write it out to a text file so it can be easily read in by the final interpretation step. The required format of the output text file is space-separated histogram bin edges in the first row and space-separated bin contents in the second row. For a five-bin triangle-shaped histogram with bin edges ranging from 0 to 8, for example, the contents would be:
0.0 2.0 4.0 5.0 6.0 8.0
0.0 1.0 2.0 1.0 0.0
You can try setting up the container for this step yourself in the following exercise.
Exercise (25 min)
Create an executable named
ReformatHistthat takes the ROOT histogram produced byAnalysisPayload, and converts it to a text file containing theh_mjj_kin_calhistogram in the format described just above this exercise. The command to run the finished executable will be:ReformatHist /path/to/output/hist.root /path/to/output/textfile.txtPart 1
In your git repo, create a new file named ReformatHist.cxx in the AnalysisPayload/utils directory.
cd AnalysisPayload/utils
touch ReformatHist.cxx
cd up the main repo and, if you haven’t already, run a container from the
atlas/analysisbase:21.2.125image, volume-mounting the whole analysis repo into the container.cd ../../../.. docker run --rm -it -w /home/atlas/Bootcamp -v \ $PWD:/home/atlas/Bootcamp atlas/analysisbase:21.2.125 \ bash -c 'cp -r ssh-credentials ~/.ssh; cp gitconfig ~/.gitconfig ; bash'Part 2
Now, add a new executable to your CMakeLists.txt file in AnalysisPayload named
ReformatHistthat will run the code. Consider which libraries will actually need to be linked, and which ones can be safely omitted for this executable.Part 3
Fill in ReformatHist.cxx so the corresponding ReformatHist executable can accomplish the task described in the beginning of the exercise. You can compile and test the code in the container as you work. Start with the following skeleton:
// stdlib functionality
#include <iostream>
#include <fstream>

// ROOT functionality
#include <TFile.h>
#include <TH1D.h>

int main(int argc, char **argv) {

  // Open the input file
  TFile *f_in = new TFile([FIXME]);

  // Collect the histogram from the file as a TH1D
  TH1D * hist = (TH1D*)f_in->Get("[FIXME]");

 // Initialize the outputfile object
 std::ofstream f_out([FIXME]);

 //---- First write the bin edges -----//
 // Get the bin width and number of bins from the histogram
 double bin_width = [FIXME] 	   // Relevant function: GetBinWidth()
 int n_bins = [FIXME]            // Relevant function: GetNbinsX()

 // Loop through all the bins, and write the lower bin edge to the ouput file (with a space between subsequent bin edges)
 for(int iBin=1; iBin < n_bins+1; iBin++)
 {
   [FIXME]                       // Relevant function: GetBinLowEdge()
 }

 // Add the bin width to the lower edge of the last bin to get the upper edge of the last bin, and write it to the text file
 [FIXME]                         // Relevant function: GetBinLowEdge()

 // Now write the bin contents, again with a space between subsequent bin contents
 for(int iBin=1; iBin < n_bins+1; iBin++)
 {
   [FIXME]                        // Relevant function: GetBinContent()
 }

 f_out.close();
}
Part 4
When you’re satisfied with the result, you can commit and push your updates. Check to ensure that the new image builds on gitlab without any errors.
Solution
Part 2
The addition to CMakeLists.txt should look like:
ATLAS_ADD_EXECUTABLE ( ReformatHist utils/ReformatHist.cxx
                     INCLUDE_DIRS ${ROOT_INCLUDE_DIRS}
                     LINK_LIBRARIES ${ROOT_LIBRARIES})
Part 3
ReformatHist.cxx should look something like:
// stdlib functionality
#include <iostream>
#include <fstream>

// ROOT functionality
#include <TFile.h>
#include <TH1D.h>

int main(int argc, char **argv) {

  // Open the input file
  TFile *f_in = new TFile(argv[1]);

  // Collect the histogram from the file
  TH1D * hist = (TH1D*)f_in->Get("h_mjj_kin_cal");

  // Write the bin edges and contents to the output file
  std::ofstream f_out(argv[2]);

  // First write the bin edges
  double bin_width = hist->GetBinWidth(1);   // Needed for computing last bin edge
  int n_bins = hist->GetNbinsX();

  for(int iBin=1; iBin < n_bins+1; iBin++)
  {
    f_out << hist->GetBinLowEdge(iBin) << " ";
  }

  f_out << hist->GetBinLowEdge(n_bins) + bin_width << std::endl;

  // Now write the bin contents
  for(int iBin=1; iBin < n_bins+1; iBin++)
  {
    f_out << hist->GetBinContent(iBin) << " ";
  }

  f_out.close();
}
Bonus Exercise!
The task we accomplished above in pure ROOT could also be accomplished with a fair bit less coding by making use of python’s uproot or rootpy+root_numpy packages. Since the amount of data encoded in the histograms is very small compared with the original DAOD, any speed losses we may suffer in going from pure ROOT code to python for this step are essentially negligible. As such, this is a situation in which it may well be to our benefit to take advantage of high level python modules. The main downside in our particular case is that
atlas/analysisbase:21.2.125doesn’t have a ROOT installation with python bindings (needed for rootpy+root_numpy) or python 3.6 (needed for uproot), so it’s best to build or own docker images for this task.we provide “starter” repos for both uproot and rootpy. You can choose to work with one of them depending on your desired implementation.
Each repo includes:
- a Dockerfile which specifies the base image and installs any required dependencies (feel free to add more dependencies if you need to!),
- a source code file to start with that includes/imports the libraries/modules that you’re likely to need (feel free to add more if needed!), and some guiding comments.
Starter repos
uproot (link to gitlab repo): The Dockerfile starts from the official python:3.6 base image, and installs the uproot python module on top of it. The uproot.open function can convert the ROOT file into a “ROOTDirectory” object, from which the
h_mjj_kin_calcan be read and converted to a numpy array with thenumpy()function, as described in the github README.rootpy_numpy (link to gitlab repo): The Dockerfile starts from a centos7 image with ROOT (+python2.7 bindings) pre-installed, and installs the rootpy and root_numpy python modules on top of it. rootpy’s root_open function can be used to read in the
h_mjj_kin_calhistogram from the ROOT file (this part is already filled in since the online documentation isn’t very thorough), and root_numpy’s hist2array function can be used to convert the ROOT histogram to a numpy array.Make a personal fork of the repo you want to work with (or try making your own from scratch if you’re wanting an extra challenge!), and make any updates you need to the source code and Dockerfile to create the desired executable. Add a .gitlab-ci.yml file to automatically build the docker image when you push commits to the repo.
Solution
Full working solutions for each repo can be found in the
solutionbranch of the repo.
Now that we’ve got our environment and executable set up, we can encode this second step in yadage and add it to the steps.yml file:
reformatting_step:
  process:
    process_type: interpolated-script-cmd
    script: |
      source /release_setup.sh		# NOTE: This command shouldn't be needed if you're using an image you produced in the bonus "python-implementation" exercise!
      source /Bootcamp/build/x86_64-centos7-gcc8-opt/setup.sh
      cd /Bootcamp/run
      ReformatHist {hist_root} {hist_txt}     # Change the exact run command if your executable has a different name or location
  publisher:
    publisher_type: interpolated-pub
    publish:
      hist_txt: '{hist_txt}'
  environment:
    environment_type: docker-encapsulated
    image: [gitlab registry image for your analysis repo]
    imagetag: master
along with the corresponding workflow.yml stage:
- name: reformatting_step
  dependencies: [skimming_step]
  scheduler:
    scheduler_type: singlestep-stage
    parameters:
      hist_root: {step: skimming_step, output: selected_events}
      hist_txt: '{workdir}/selected.txt'
    step: {$ref: steps.yml#/reformatting_step}
Exercise (5 min)
Put together and run a
packtivity-runcommand to test the reformatting step.Solution
packtivity-run steps.yml#/reformatting_step -p hist_root="'{workdir}/workdir/skimming_step/selected.root'" -p hist_txt="'{workdir}/selected.txt'"
The yadage-run command to test the updated workflow should be the same as before, since we haven’t added any more initial files or parameters:
yadage-run workdir workflow.yml -p signal_daod=recast_daod.root -d initdir=$PWD/inputdata
Key Points
The yadage syntax for defining our analysis steps is not too different from our helloworld example.
The main things that change are the details of the script processes and the docker image to run.